Showing posts with label stranded colourwork. Show all posts

Friday, 18 May 2018

Stranded Colourwork Playbook in the shop!

£19.99

Felicity Ford's new book is an exciting sequel to the KNITSONIK Stranded Colourwork Sourcebook.
The Playbook offers inspiration for applying patterns found in daily life to unique hand knits including knitted correspondence and bunting

Ideas on translating the textures of your town into a cowl and experiments  with scale and proportion when working with motifs.

Featuring the voices and ideas of many friends from the community of knitters who already enjoy working with the KNITSONIK system, this collection is full of fun, friendship, and designs that invite you to play.


Thursday, 18 April 2013

Snawpaws - mitts in Spring time knit along!

Just a reminder that we're having another knit along - SnawPaws by Kate Davies.

{photo credit - Kate Davies}

The Snawpaws pattern includes instructions for mittens and mitts (fingerless mittens!)

You'll need a 4ply weight yarn - We're using Jamieson's of Shetland Spindrift.

You'll need 115m (165m) of the main Colour (MC) and 115m (115m) of the Contrast Colour (CC) for the mitts (mittens). We've checked with Kate and 1 ball of Spindrift in main colour and 1 ball of the contrast colour is fine for the mitts unless you make them longer!) and 2 balls in the main colour and 1 of the contrast colour for the mittens.

 For needles you will need:- 2.5mm (UK 13-12/US 1-2) double-pointed needles or circular needle for working in the magic loop method (or size to get gauge) If you are using a circular needle, then spare 2.5mm (UK 13-12/US 1-2) dpns will be needed for working the afterthought thumb 2.75mm (UK 12/US 2) double-pointed needles or circular needle for working in the magic loop method (or size to get gauge) 

Techniques used include:-
working in the round beaded rib stitch
increasing
stranded colourwork
after thought thumb

This is much easier than the Sheep Carousel ( no provisional cast on, steeking, vikkel braids or double centred decreasing!)

Like the Sheep Carousel and All You Need knit along we'll post updates and tutorials on this website, So even if you can't get to the shop you can still knit along!

Fancy joining in? You can get the pattern and 2 balls of Spindrift for £7.50 until 25th April. If you want to do the Mittens (and so need an extra ball) it will only be £9.50.

But of course you can always use stash yarn too! The pattern is £2.95.

Now which colours?


Thursday, 11 April 2013

a needle book...

As part of our First Steps in Fair Isle workshop you make a needle book for your pins and needles etc.

Its an ideal project to try out a new technique as it's a small and achievable item as well as practical!

You begin by practising your Continental knitting (full instruction given) on your inside page before moving on to your patterned outside cover.

Janice also shows you how to add beads to your knitting using a crochet hook.  You might not get the needle book finished during the workshop but you do get to take all your materials home.


Included in the workshop fee is a ball of Rowan Felted Tweed and bamboo needles as well as lots of  lengths of contrasting colours.

(Fiona)  Here is my finished piece...


and my inside page...


I added some stripes of contrasting colour and also weaved some yarn into the finished piece... to use up all my leftover bits of Felted Tweed.

Janice recommends felting the finished piece - it creates a sturdy fabric for your needles as well as concealing any wonky tension and stray stitches!

I felted mine in a basin of hot water with a squirt of washing liquid.  Full instruction and a demo at the workshop!


after felting

felting makes the stripes look fuzzy!

I trimmed round the edges (I also added some blanket stitch to the outside cover) and used running stitch up the spine to hold the inside page...

trimmed

inside page

filled - includes the lovely simple solid stitch markers by Fripperies & Bibleots!

The next First Steps in Fair Isle workshop is on Sunday 2nd June.  Full details on our workshop page!  Call the shop to book your place.

Monday, 17 September 2012

Sheep Carousel - the sheep!

You can read more about out Knit A Long here.

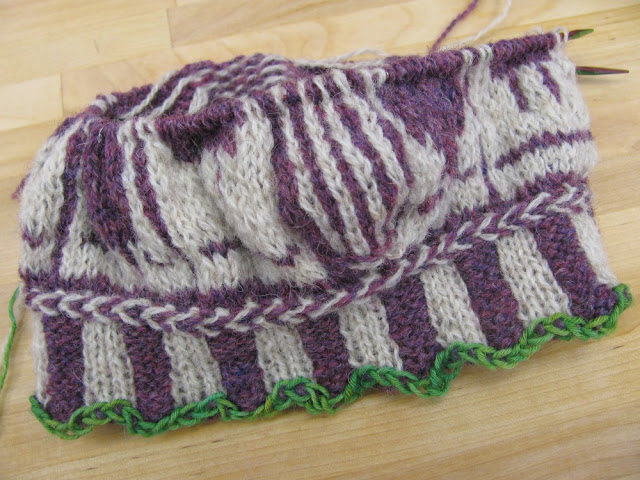
After the provisional cast on, corrugated ribbing and a vikkel braid we're onto the sheep!

photo credit: Kate Davies

But first we need to cast on more stitches... a backward loop cast on.  Probably the simplest cast on and shown here.  Remember and use different stitch markers to mark the spout and the handle.

The sheep will be done as stranded colourwork rather than as intarsia (which is used for block motifs... you can read our beginners guide about intarsia here)

There is nice article about stranded colourwork here at Let Me Explaiknit.

Basically you're using two colours on each row and stranding the unused colour behind the colour in use.  Stranding just means letting the unused yarn 'stretch' or float across the back of the colour that is in use, so that you can knit with it later along the row.

There are different ways to do this... holding both colours in one hand and picking up and dropping the yarns as required or using both your hands - one to hold each colour.  You then pick one colour (Continental style) and throw the other (English/US style).

There is an excellent video here from Knit Picks which shows this two hand technique as well as how to deal with your floats.

In the Sheep Carousel pattern, Kate suggests that there is no need to weave in or wrap your floats if your tension is consistent.  Weaving/wrapping you floats is explained in the Knit Picks video.  They suggest you do it when you have to strand your yarn over 5 or more stitches.  Other advice puts this number higher and lower!  Let Me Explaiknit also highlights that the type of yarn and how knitted items are to be used can also determine how you deal with floats.

For example if you are using a cotton or blend or even a superwash wool then the yarn is unlikely to 'stick' together as well as a pure untreated wool.  Also if its for a garment, especially for a child, then long floats might get caught.

(Fiona)  So!  This is my first time doing stranded colourwork.  Having watched the Knit Picks video I felt ready to try the two handed method.  I had already used the Continental 'picking' style whilst knitting some of my Color Affection, so I felt comfortable with that.

Also holding each yarn in a different hand stopped the balls tangling.

I was very unsure what to do with my floats though! Despite Kate's assurances that as long the tension was consistent there was no need to weave them, in I wasn't reassured.  I wasn't sure my tension was consistent, especially in my left hand (picking) and I'm a loose knitter anyway.  So I've done both (which goes against my nature as I do like to be consistent!)

long floats v's wraps

I have now decided to go with the no weaving/wrapping and just carry my floats freely.  I like the look of the long strands better than the wrapped ones and the purple did show through a few times when wrapped by the white. I'm using non superwash Shetland wool that will surely 'stick' together nicely and its a TEA COSY!  It is not getting pulled on and off a small child's head.... hopefully.

my 'steek' stitches

something missing?

So I was happily knitting along, silently debating wrapping v's not wrapping, loving the feel of the Shetland wool, marvelling at my stranded colourwork prowess and congratulating myself at remembering to cast off the spout steek on row 15 (this is marked on the chart - you may like to highlight it further).

And then... I realised I was so consumed with bringing in the 'higher' sheep that I completely missed the 'lower' sheep face!!!!  There was no easy way to fix it other than knit backwards to get back to row 12.

So, my hot tip is... pay attention the chart!

(Although like most things in this pattern knitting, backwards in two colours wasn't so difficult after all.)

Remember to post  your photos to our Facebook wall and Ravelry group (there are a few photos already there).